Personal Conference and Audio Only Meetings
A Personal Conference meeting includes an audio portion and an online portion. Start the audio portion and the online portion is automatically created on your Webex site. If you are in the audio portion of the meeting and need to share a presentation, document, or application with meeting participants, you can start the online portion of the meeting and the participants can join it while still participating in the audio portion of the meeting. The host needs to set up their Audio Pin and save it before being able to generate the Personal Conference meeting account information. The host access code and host pin needs to be entered for the host to start the meeting.
You can create and store up to three Personal Conference number accounts. When scheduling a Personal Conference meeting, select one of your Personal Conference number accounts to use for the audio portion of the Personal Conference meeting. You can also use your Personal Conference number account to start an instant audio conference from any phone without scheduling it first. For each account, you can generate host and attendee access codes. If the global call-in option is enabled for your site, it is also available for Personal Conference number accounts you create.
Your Personal Conference number account also specifies the host access code that you want to use to start the audio portion of the Personal Conference meeting, and the attendee access codes that attendees can use to join the audio portion of the meeting.
You can delete a Personal Conference account at any time.
Personal Conference meetings are available only if your site supports Personal Conferencing and if your site uses Webex Audio. You can conduct an on-demand Webex Audio conference anytime, anywhere. You can also use your Personal Conference number when scheduling regular Webex meetings.
Set up your personal accounts in Webex Meetings.
| 1 |
Go to . |
| 2 |
Next to the Audio section, select Set up. The host needs to set up their Audio Pin and save it before being able to generate the Personal Conference meeting account information. |
| 3 |
Under Personal Conferencing, select Generate account. You can create up to three Personal Conferencing accounts. Personal Conferencing accounts include a host access code and a host pin that are used to start the audio portion of a Personal Conference meeting. They also include an attendee access code so others can join. The host access code and host pin needs to be entered for the host to start the meeting. You select one of your Personal Conferencing accounts when scheduling a Personal Conference meeting. You can also use one of these accounts to start an instant Personal Conference meeting from any phone, without first scheduling it. You can delete a Personal Conferencing account at any time. |
| 4 |
Select Save. |
| 1 |
From the left navigation bar of your Cisco Webex site, select Meetings, then click Schedule
|
| 2 |
Select Webex Personal Conference for the Meeting type. |
| 3 |
Fill in the rest of the information needed for your meeting, and click Schedule |
 .
.
 .
.
-
When Webex is integrated with Outlook, it provides the basic options for scheduling a meeting. Some options that are available on your Webex site might not be available in the Webex integration to Outlook.
-
The Webex integration to Outlook does not support all the recurrence options that are available in Microsoft Outlook.
-
The start time for any meeting invitations that you send from Microsoft Outlook appear in the time zone that is set on your computer and might not match the time zone preferences you have set on your Webex site.
| 1 |
To schedule a Personal Conference meeting, do one of the following:
You must enter the Webex settings before you can specify the general meeting information. |
| 2 |
In the Outlook meeting or appointment, specify the general meeting information.
|
| 3 |
Enter invitees names or email addresses in the To box. If you selected Appointment to schedule your meeting, select Scheduling Assistant to see the To box. |
| 4 |
Select Add Personal Conference Meeting. This step is not necessary if you selected Schedule Personal Conference Meeting in Step 1. |
| 5 |
If necessary, enter the Personal Conference Meeting information requested. |
| 6 |
If necessary, in the Webex Settings Audio & Tracking tab, choose the audio connection type and any other required options. |
| 7 |
(Optional) Select the Resources tab to add alternate hosts. An alternate host is someone who has permission to start and host your meeting when you cannot attend. For more information, see Add Alternate Hosts for Scheduled or Personal Room Meetings. |
| 8 |
Select OK. |
| 9 |
Select Send to send the meeting invitations to the invitees. |
Set up a Personal Conference meeting by using the Webex integration to Outlook for Mac.
| 1 |
Do one of the following:
|
| 2 |
Specify the general meeting information.
|
| 3 |
Enter invitees names or email addresses in the To box. If you selected Appointment to schedule your meeting, select Invite Attendees to show the To box. |
| 4 |
Select Add Personal Conference Meeting. |
| 5 |
If necessary, enter the Personal Conference Meeting information requested. |
| 6 |
Specify Personal Conference meeting settings.
|
| 7 |
Select Send to send the meeting invitation to the invitees. |
| 1 |
To schedule a Personal Conference meeting:
The New Calendar Entry tab shows.
|
| 2 |
Select Add Personal Conference Meeting or Add Audio-Only Meeting. |
| 3 |
If necessary, enter the Personal Conference Meeting information requested. |
| 4 |
Specify general meeting information:
|
| 5 |
To invite people to the meeting, select an address book icon and in the Invitees panel select invitee names or enter the names manually. Any attendees that you invite by using Webex integration to Lotus Notes will not appear in the attendees list for the meeting on your Webex site. For additional information about inviting attendees in Lotus Notes, refer to Lotus Notes Help. |
| 6 |
Process the invitation.
You can change any meeting settings after you schedule it. Webex Productivity Tools adds the scheduled meeting to your Lotus Notes calendar and the public calendar on your Webex site.
|
Using the Lotus Notes repeat options, you can specify a recurrence pattern for your meeting. For example, you can specify that a meeting recurs every Wednesday at 2:00 p.m. until a specific date. WebEx integration to Lotus Notes schedules the meeting on each day that you specify in the recurrence pattern.
However, depending on your service, some of the Lotus Notes repeat options may not be supported. For more information, see Recurrence Pattern Limitations in Webex Integration to Lotus Notes.
| 1 |
If you have scheduled a meeting using WebEx integration to Lotus Notes, open the calendar entry in your Lotus Notes calendar. 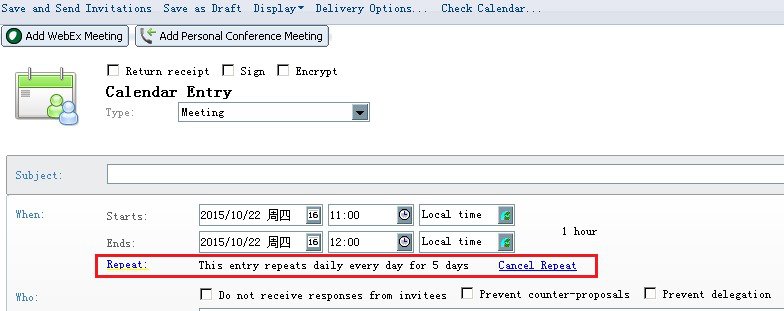 The Repeat Options dialog box appears.
|
| 2 |
Specify the repeat options in the dialog box, and then select OK. |
The following table shows the differences between Webex and Lotus Notes recurrence patterns.
|
Type |
Lotus Notes Option |
Converted to Webex Meeting Option |
|---|---|---|
|
Weekly |
Every 1-8th weeks on: [Sunday, Monday, Tuesday, Wednesday, Thursday, Friday, Saturday] |
For Meeting Centers: Every 1-8th weeks on: [Sunday, Monday, Tuesday, Wednesday, Thursday, Friday, Saturday] For Event Center events and Training Center training sessions: Every week on: [Sunday, Monday, Tuesday, Wednesday, Thursday, Friday, Saturday] If you schedule a meeting that repeats every X week, where X is greater than 1, in Lotus Notes, the meeting will be scheduled in Lotus Notes as you specified, but will appear as a weekly meeting on your Webex site. |
|
Monthly |
Count from the end of the month |
Not supported |
|
Yearly |
Every 1- 10th year |
Every year. If you schedule a meeting that repeats every X year, where X is greater than 1, in Lotus Notes, the meeting will be scheduled in Lotus Notes as you specified but will appear as a yearly meeting on your Webex site. |
|
Custom |
Custom settings |
Not supported |
|
End date |
Start from date to date |
If the time period is longer than one year, it is converted to one year. |
|
Start from date continue for X times |
If the time period is longer than one year, it is converted to one year. |
|
|
Specify Exceptions |
Don't move |
Not supported. |
|
Move to Friday |
Not supported. |
|
|
Move to Monday |
Not supported. |
|
|
Move to nearest weekday |
Not supported. |
|
|
Delete |
Not supported. |
|
Type |
Lotus Notes Option |
Converted to Webex Personal Conference Meeting Option |
|---|---|---|
|
Daily |
Every 1-31th day |
Every day |
|
Monthly |
Every 1st-12th month on the 1st -31st |
Every month on the [1st, 2nd, 3th, 4th, day last] [Sun, Mon, Tue, Wed, Thu, Fri, and Sat] |
|
Count from the end of the month |
Not supported |
|
|
Every 1st-12th month on the [1st, 2nd, 3th, 4th, last][Sun, Mon, Tue, Wed, Thu, Fri, Sat] |
Every 1 week on [Sun, Mon, Tue, Wed, Thu, Fri, Sat] |
|
|
Yearly |
Every 1- 10th year |
Not supported |
|
Custom |
Custom settings |
Not supported |
|
End date |
Start from date to date |
If the time period is longer than one year, it is converted to one year. |
|
Start from date continue for X times |
If the time period is longer than one year, it is converted to one year. |
|
|
Specify Exceptions |
Don't move |
Not supported. |
|
Move to Friday |
Not supported. |
|
|
Move to Monday |
Not supported. |
|
|
Move to nearest weekday |
Not supported. |
|
|
Delete |
Not supported. |
|
For modification or deletion of a repeating meeting in Lotus Notes, note the following:
|
Personal Conference meetings and Audio Only meetings do not start automatically at scheduled times. You must start the audio portion of the meeting first and then you can start the online portion.
|
If you escalate the Personal Conference meeting to an online meeting, only the first 25 participants can join the online portion of the meeting. |
| 1 |
Start the audio portion of the meeting by calling the number listed in the email invitation or on the Personal Conference Meeting Information page. This button is available only if the audio portion of the Personal Conference meeting has already started. |
| 2 |
Follow the audio prompts and enter the host access code and audio pin. The host needs to set up their Audio Pin and save it before being able to generate the Personal Conference meeting account information. |
| 3 |
Start the online portion of the meeting,
|
You can set the following preferences for your Webex site account.
| 1 |
Go to . |
| 2 |
Select Expand all to expand all sections, or select an individual section to expand it. |
| 3 |
Specify your preferences in each section:
|
| 4 |
Select Save to save your changes. |
The following keypad commands are available during a Personal Conference Meeting. The host has access to functions that attendees do not.
If you start the online portion of your Personal Conference Meeting, the telephone keypad commands are no longer available.
| To... | Enter... |
|---|---|
| Hear all keypad commands | ** |
| Mute your audio | *6 |
| Unmute your audio | *6 |
| Play the participant count | *# |
| To... | Enter... |
|---|---|
| Lock the meeting; prevents anyone else from joining | *5 |
| Unlock the meeting | *5 |
| Send an email reminder | *7 |
| Let participants continue the meeting without the host | *8 (then hang up) |
| Mute all attendees | ## |
| Unmute all attendees | 99 |


